Hey Marketer,
Good Day! Today we will talk about more in details about Yoast SEO Plugin and how-to setup and how to use it.
Step by Step.Now a day, for many site owner/webmasters are facing some issue on SEO. This can’t be an issue or case. This is high time we could change or educate each other.

While you are hiring a highly skilled SEO expert, there is also plenty you can do by your own without investing your money as well as you can customize your site too.
So Today I am going to merge this problem and the solution is WordPress and Yoast SEO Plugin.
Recently, I already discussed Ultimate WordPress for Beginners so that you can make sense about WordPress.
Since Yoast SEO Plugin offers many features and helpful content making so that we can optimize our site based on On page SEO.
For this reason, Today I will share with you how to setup Yoast SEO Plugin for WordPress and optimize your SEO performance. Step by Step.
How to setup Yoast SEO plugin:
Guide to Setup Yoast SEO Plugin
Yoast SEO setting and Configure
Content Optimization
Home Page Optimization
So,
What is Yoast SEO?
Yoast SEO is a free WordPress plugin which is used for content optimizing where it is used to aim your numbers such as focus keyword, meta description, header optimization, title optimization, canonical setup and many more and boost your search result.
Now, The question comes to your mind is,
Why Yoast SEO Plugin?
You know, most of the people don’t know how to do code for a site and make it optimized. But this plugin helps you if you don’t know how to do code. So Congratulation! You are in the right place.
Why Choosing The Yoast SEO plugin?
Because of:
- Title meta settings
- Support Facebook Open Graph
- Keyword Density check
- Verified sites in Google and Bing
- Generates Sitemap
- Focus Keyword Setting up
- Meta Description settings
- Image optimization
- Inbound and outbound link check
- Advance Permalink check
- Breadcrumbs Support
- Data can be hide from Google
You know, if you do it by coding, it will take time and waste of money.
Guide to Setup Yoast SEO Plugin
We all know WordPress uses open source software which means it can be customize as you want. That’s why Developers are making so many plugins for WordPress and make it simple as well as easy to use.
One of the Best Plugin that most of the markets are using right now and that is Yoast SEO Plugin. You can find this Plugin From

WordPress Dashboard>Plugins> Add New>Search> Yoast SEO.
You will see the Plugin. After then Install the Plugin and Active.
Yoast SEO Settings and Configure
At this point, without setting up all the configure, Google doesn’t show your site and it wouldn’t be optimized. So before publishing your site, setting up your Yoast Plugin as well as Essential things to install after installing WordPress.
You know, in the WordPress Plugin there is also a plugin called All in One SEO pack. This one is also a popular tool many marketers are using. For more details, we prepare you to watch Yoast SEO vs All in One SEO and compare.
Some of you might use Genesis or StudioPress theme. They already have their own tools whereas they added some SEO tools which will help you optimize your site. Otherwise, you can use Yoast SEO Plugin and it’s free.
First of all, when you active Yoast SEO you will see a notification and SEO bar in your WordPress Dashboard. In here we are going to show you Yoast SEO Settings Step by Step.
Step 1. General Setting
After installing Yoast SEO in your WordPress Dashboard, you will see SEO > General. In the General Settings, Yoast SEO will show you some notification based on your site configure and it will help you identify what really need in your site.


In the image, you have seen that Yoast SEO show some issue what you need to update.
The most important thing in here, Permalink settings and add to Google Search Console. Remember, when you set up your all configuration and update your minimum post then Upload or update your Google Search Console.
Yoast SEO Features
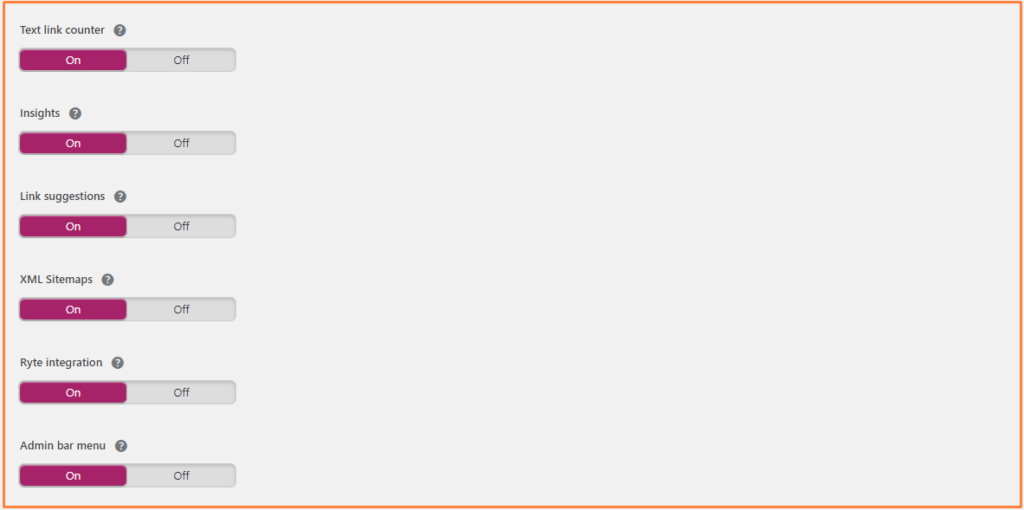
Second thing is Yoast SEO Feature.


In the feature option, you can enable or disable a lot of features what you need based on your requirement. I prefer you to use the default section because they have already added those settings based on your website. You can also see the question mark option whereas you can get more information on the specific feature.
Webmaster Tools
If you already learn about SEO, you will definitely be heard about some popular webmaster or search engines such as Yahoo, Google Bing, Yandex, Alexa. The search engine will help the owner to add their site in the webmaster. (See our guide how to add webmaster in the search engine).
The Webmaster tools help you identify your site in the search engine and it will help you get traffic. Also, Webmaster tools show you more insight and relevant data based on your Website.
Before add this setting, please consider to add XML sitemaps in WordPress.

Remember that to verify your site, you have to upload your meta tag in your WordPress dashboard Area. (See our guide how to configure theme editor in WordPress).
Step 2. Search Appearance
In the Yoast SEO bar, you will see the Search Appearance. You know in the SEO, you need to make sure that what will be your title would be, how would be your title separation, how would be your content type. That will help your site more resourceful.

General Settings in Search Appearance
Here you can choose your title separator whereas it will display between your post name and post title. Also, you can edit your homepage display option whereas you can express your site info. In the knowledge graph, you can express that if you are a company or person. Select as your requirement.

In the search engine if you type any phrase you will get the result of title separator.

Content Types
By default, WordPress already has post type, media type, navigation menus & Pages Types. Also you can add own custom type in WordPress.

Yoast seo Content types
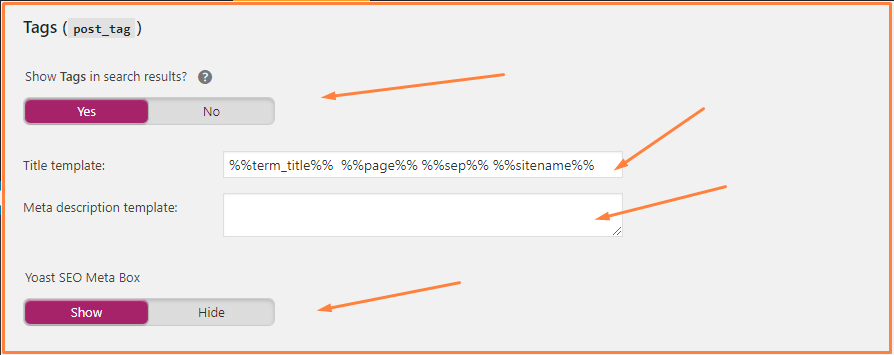
In this settings, Yoast SEO allows you to get up post, page & media types. In this section, title and meta description are given by default. We recommended that don’t change it here. You can change anything in post, media, page section in WordPress Dashboard. Also, you can edit Categories & tags.
Other option in this section, user can use as we recommended. Because those options, we are using that was tested and make for user friendly.


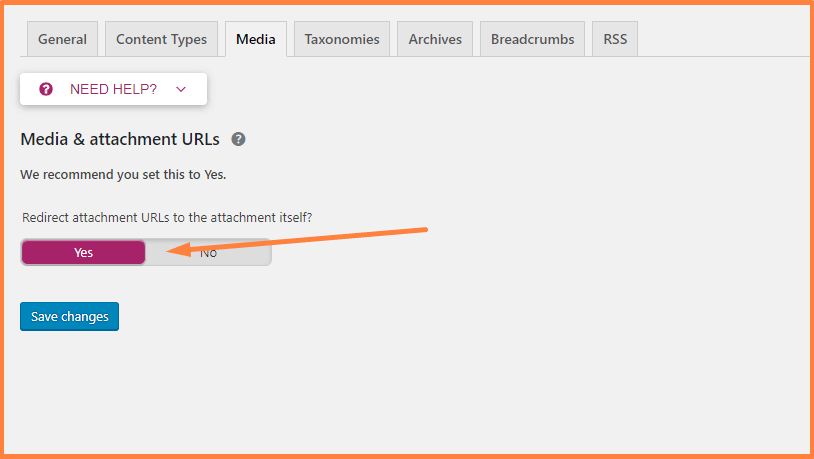
Media
Also, user can choose or deactivate their media as per their website. If you are confused about all those options contacts us and I will be glad to help you. If your image is not copyright, then you can make it “Yes” in your media & attachment URLs option.

Because media is also a major part in SEO or ranking of your site.
Do you want to know how to optimize your WordPress Blog Posts?
And
WordPress SEO Tip for Beginners
Taxonomies
Taxonomies are group of things together where user can group them together according to various characteristics and assign those in different function.
In WordPress, user can assign those function such as their requirement. Such as Categories, tags, symbols.
At this point, Yoast SEO allows you to make categories, tags and symbols show in the search engine. We recommended you that follow your instruction which will you more realistic in the search engine.


You can choose if you want to show them in the search engine or not. If not, it will have a noindex robots meta and will be excluded from XML sitemaps.
Archives
If you are running a one author blog, this author blog archive will be exactly the same as your home page. This is where you can identify yourself. Otherwise, disable it or to add noindex to it so it doesn’t show up in the search results.

Remember, before change the settings go to your theme dashboard and change your author page from the dashboard. If you use Genesis or Thrive theme, it’s easy to identify.
Breadcrumbs
Breadcrumbs is a direction of a way whereas it will indicate where we are going if you don’t the way or you lost. Breadcrumbs is a small text path, frequently located at the topmost of the website.
It will be look like this one:

There are diffirent type of Breadcrumbs:
- Hierarchy based breadcrumbs
- Attribute-based breadcrumbs
- History-based breadcrumbs
In the Yoast SEO allows those settings in your site and It reflect in the search result. You can enable or disable as your requirement.

But recommended you that enable this setting because Breadcrumbs appearing in Google and your search preference. Also, they enhance the user experience with the help of Breadcrumbs.
RSS
Many of you know about RSS or RSS feed reader. To do this you need to install a plugin called RSS feed reader. You can edit this setting from RSS feed reader and ping Feedburner then applies it in Yoast SEO.
Step 3. Search Console
Search Console is a free tool to check how the user site performs. It not just showing your site in the search engine but also it shows how search engine help in the search terms. In one word, it will help you index your site.
Previously I talked about different types of search engine which allows user search in different search engine such as Google, Yahoo, Bing, Yandex.
But now, I just want to talk about Google search authorization which is very easy. But before doing this you have to add your WordPress site to Google webmaster tools and add XML sitemaps in WordPress.

First, click the Get Google Authorization Code and allow with your Google account.

Copy the code and Paste it Search Console Form.

Apply the Authenticate.
Done.
After a few moments later, you will some option created by Yoast SEO.
Step 4. Social
Social profile is now a major part of making a social preference. Your social preference will increase your brand identity, make awareness about you or your company or your blog, increase your site traffic.
So Social Media is now a good choice to make your brand identity.
Yoast SEO allows you to add your Social proof to your site and make your blog user-friendly as well as more attractive.

There is also a different Social account such as Facebook, Twitter, Pinterest, Google+. You can edit as your requirement.
Tools
This is an awesome and useful feature of the WordPress SEO by Yoast SEO plugin. You can edit your post, file or bulk file from this section.
But do remember, before doing anything use FTP access as well, because of if anything misled in the default file, your site will automatically shut down. So before editing anything you can read more about robot.txt and .htaccess below:
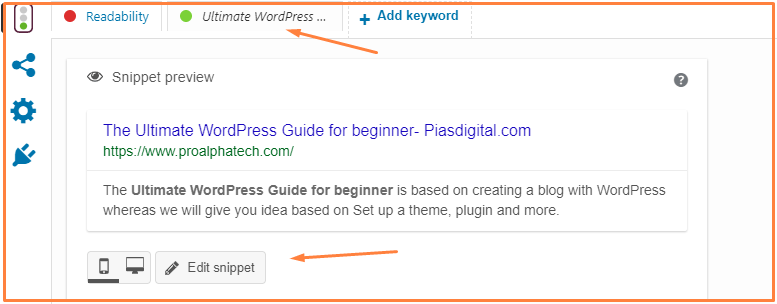
When you are done with all the setting of the WordPress SEO by Yoast SEO, after then you can post and when you post make the green in your all section.


This one is one of the best SEO plugins for WordPress Blog. I highly recommended you to use this plugin to optimize your site.
Do remember, negative optimization can affect your search preference. So, I always recommended using as I said or contact me if you are not sure.
Like my effort? Please share this post with others and your friends.
For further reading:

